If you're like me, and the Christmas/winter holidays littered your house with amazon boxes, you're already well on your way to making some easy magazine holders. You might also have an iron, some fabric, hot glue or craft glue, a sharpie, duct tape, measuring tape/ruler, and scissors. It also helps to have some kind of straight edge.

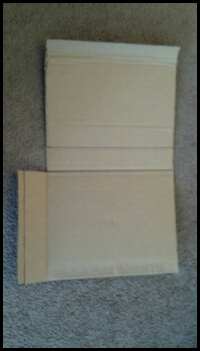
First, I took a medium-large box and laid it out completely. I cut off as much tape as possible, and tried to get the whole thing flat. Then, I measured out the basic dimensions. Most paper is 8.5x11 inches in the US, so I made the long sides 9 inches wide, created a spine between them 2 inches wide, and below one of the long sides I cut a bottom that was 2.5 inches wide, so I would have a little lip to secure to the side and hold the shape. I experimented with two dimensions, one with a 2 inch spine and one with a 3 inch spine. The larger one was a little more stable standing, and better for binders and such. Most boxes have a lot of natural creases built in, so I used these as a guide. That was very helpful, and I ended up going with the natural height of the box, which was something like 11.5 inches. I then used closed scissors and scored along the places where it would bend. I marked the lines in black sharpie here. This is a very useful tool, and helps keep your scoring straight.


I made sure to iron my fabric cover (that's what the iron was for), and laid it out under the pattern, wrong side up. There are a couple ways to do this, depending on your skill, scissor sharpness, and general coordination. I found it most effective after a bit of trial and error to place the pattern on the fabric, leaving generous room for seam allowance, and used hot glue to make a line around the outer edge of the pattern and stick it to the fabric. This is kind of hard, and if you are using hot glue, you need to do one line at a time and stick it to each one before the glue cools. You can put glue all over the surface that's being covered, but with hot glue that kind of sticks up and if your fabric is thin, might be obvious on the finished product.

After the fabric is more or less secure, cut around the shape, again, leaving a bit of seam allowance. I left about an inch all around. you will have to cut a diagonal line where the bottom piece meets the spine in order to get the fabric to lay right. Then glue the fabric carefully onto the inner edges of the pattern. I was worried at first that I might have to allow for folding, but with the fabric I used it didn't make a difference. I just glued everything straight on, and when I folded it up it didn't really stretch or pull. Try to make sure there aren't bits of the corner folds sticking up by putting some glue between the folds.

Now it's time to put it together! Basically, it all kind of just happens intuitively, but fold up the bottom flap to a 90 degree angle, fold that last half-inch bit another 90 degrees, put a line of glue on the outside of that half-inch bit, and fold the spine and the other side up and over, so that the inside of the other long side glues flush with the bottom.

Obviously, you can decorate it any way you like. I decided to keep it fairly simple, and just add a ribbon around the bottom. Simply cut to the desired length, and glue on. You could go in any direction with this though, in fact if you have cool wrapping paper instead of fabric, that's probably a great option for your base cover. You could add beads, glitter, ribbons, decoupage, whatever. Make it a theme. Make it a mess. It's your thing, that's kind of the point!

And Voila! There's your magazine holder! Simple, takes about 10 minutes per piece depending on your level of skill. I'm sure there are more sophisticated ways to do this, but this was what I came up with in a pinch.

I'm kind of proud of it, since I just sort of did it without any tutorials. Some of the commercially sold ones also have a piece on the front, making it more of a closed box. I think that would be really easy to add, just cut a piece about 4 inches long (whatever the height of the straight edge in front) and an inch wider than the spine. Score and fold a half-inch on each side, cover with your fabric or whatever, and glue it in, using the half-inch tabs to attach to the inside of the front. We'll see how these stand up to the test of time, but I think they're pretty snazzy on my desk, holding my notebooks! (which, it turns out, are too wide to allow me put a front piece on. Oh well. I might do it for the one with my headshots.)


No comments:
Post a Comment