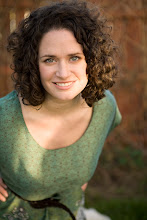
It's true, I finally got married! It's also true that I made my own dress! For the record, I do not recommend this. It was a ton of stress, and while I saved a lot of money buying fabric direct from merchants in the garment district here in LA, I was still sewing it the night before the wedding, and had to rush to press the front of the hem that morning. So, yeah. Really hard job when you're also planning your wedding, and oh yeah, working like ALL THE TIME.
But let's discuss how I made it happen!
When I was thinking about what I wanted in a dress, I started by looking at what other women were wearing in Wiccan/New Age/Pagan weddings, since that was what I was planning for the ceremony. There is a big emphasis on Medieval and Renaissance design. A lot of people seemed to have bought their garb at Ren Fairs or something similar, and many weren't in white. I had long decided to forgo a veil in favor of a flower wreath. One of the paintings that really inspired me was this one, from around the 15th century:
I especially liked the pick-ups in the front of the dress on the right! I was also heavily influenced by Neo-Classical art, Pre-Raphaelites, and of course the work of John William Waterhouse. I took the opportunity of a trip to visit my family in DC to take a camera to the National Gallery of Art. I also thought a lot about the practicalities of the dress. The wedding was in Idaho in October, and the weather there can be unpredictable. I decided it needed to have sleeves, but that the neckline should be off the shoulder. Here's a photo of the design I came up with:
I started looking at patterns, and of course I had to adjust my design. I decided to go with a combination of Vogue Patterns V1095 and V2842. I also used a skirt pattern from Simplicity. Here's the design I came up with, using these patterns:
It changed quite a bit because of the needs of the pattern. I added pick-ups in the front, and made the sleeves bell-shaped.
I decided to do a mock-up in muslin before cutting anything expensive. I bought two contrasting shades so I could tell the difference between the lace and the satin. Here's the result!
I decided I would use whatever lace I had as an overlay on the bodice. The pattern called for a straight cut along the bottom, but I thought it would look better pointed. As I mentioned, I went to the garment district for my materials. I got some good deals too, because they don't mind haggling down there! I bought some beautiful satin from Michael Levine in a color called "candlelight" that had a beautiful glow to it. I had a hard time finding something with a low sheen, but I was trying to get a fondant effect. This stuff looked like cream! I had decided a while ago to use ivory instead of white, which I think worked out well with my skin. The easy part was first, the main satin dress:
After that, I used some beautiful hand-beaded bridal net. It was really hard working around the design, and the inside of the dress is a nightmare, and I made it too big at first in the bodice, and the under-skirt dynamics were tough because it was so heavy and I ran out of time, but this is the final product!
(Huge thanks go to Israel Shirk of Avalanche Photography, and Alysha Cox who did the flowers!) Again, the bodice is a little big, but it's fully boned and laces up the back. Michael Levine was my source for steel bones which I used in the back lacing for support. And of course, it was a beautiful day for a wedding, with a clear sky and warm. I was so worried we'd all freeze, but it was actually pretty hot out! Anyway, I'm really proud of the finished product, I think for someone who's really only an amateur, this turned out really well. I got a lot of compliments and people couldn't even believe I made it myself! That's a win in my book.
Sunday, October 28, 2012
Subscribe to:
Posts (Atom)


