So last night I had a really great audition. It was intense, I felt goosebumps, and I'm pretty sure the director and casting director did too. It was for a student project, a scene study from the movie Closer (which is a pretty twisted, though well-written film), in which the director was actually using the original play script. It went so well, in fact, they asked me then and there to stick around and do a call-back that night, with an actor they liked for the opposite role, to get a chemistry read. While I was waiting around, they even dismissed one of the other girls they called back! Plus, I got a chance to chat with the guy I would be reading with. I had everything going for me!
I didn't get the part. They said I would know last night, and I haven't heard from them. But let's break this down as to why this isn't anything to cry about.
1. I loved my read. I felt like I got everything pretty much right, I was thinking character thoughts, and I was focused, something I have been working super hard on. I used a lot of the tools for auditions and scene work that I had been taught from my amazing teacher Joel Asher when I studied with him last year. I was making strong choices, and had a clear arc.
2. The director loved my read. At least, he said so. He loved it enough to want to test me with the other actor. He gave me good direction, and I felt like I made good adjustments.
3. Not getting the part pretty much means the other girl just had better chemistry with the other actor. That's a really tricky thing to try and manufacture, and is very much out of my control.
So what do I take away from all of this? I'm a good actor. There is nothing inherently wrong with my technique or my brand. And frankly, in this business, that can be an important thing to remind ourselves of. As actors we face rejection constantly, and we need to let ourselves find the victories where we can. Yes, it would have been great footage for my reel, but there will be other projects, and I can take the lessons I learned in this audition with me to the next one.
Tuesday, March 19, 2013

Sunday, March 3, 2013
DIY Organizing: Magazine Holders
I have been on a bit of a kick lately, organizing all my stuff, cleaning things out, getting rid of junk and clothes I don't use, I was looking for a way to organize some of the notebooks and binders and headshots I have piled around my desk. I decided to use magazine racks. Books and notebooks will stand up, easy to see and grab, and I won't need bookends or worry about things falling over or messy piles. The only problem, of course, is I really don't have a lot of money to spare. What with going on my honeymoon, traveling, etc, I have missed some work, and of course I'm not getting paid for acting (yet.) so I needed a solution that cost nothing. Luckily for me, I'm also super into crafts and sewing, so I had a ton of materials lying around the house!
If you're like me, and the Christmas/winter holidays littered your house with amazon boxes, you're already well on your way to making some easy magazine holders. You might also have an iron, some fabric, hot glue or craft glue, a sharpie, duct tape, measuring tape/ruler, and scissors. It also helps to have some kind of straight edge.

First, I took a medium-large box and laid it out completely. I cut off as much tape as possible, and tried to get the whole thing flat. Then, I measured out the basic dimensions. Most paper is 8.5x11 inches in the US, so I made the long sides 9 inches wide, created a spine between them 2 inches wide, and below one of the long sides I cut a bottom that was 2.5 inches wide, so I would have a little lip to secure to the side and hold the shape. I experimented with two dimensions, one with a 2 inch spine and one with a 3 inch spine. The larger one was a little more stable standing, and better for binders and such. Most boxes have a lot of natural creases built in, so I used these as a guide. That was very helpful, and I ended up going with the natural height of the box, which was something like 11.5 inches. I then used closed scissors and scored along the places where it would bend. I marked the lines in black sharpie here. This is a very useful tool, and helps keep your scoring straight.
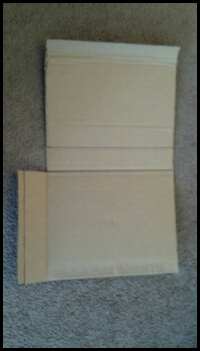 Next, I cut the slanty parts. I went 4 inches from the base, and 4 inches from the spine, made a dot at each point, connected the dots with a straight edge, and cut along the line. Fairly simple. This gives the basic shape you want in a magazine holder, so you can see the corners of the books. Hopefully, you can start to see this taking shape.

 My pattern happened to land on a spot where the box was meant to bend, but I didn't want my holder to bend there. Obviously, depending on the size of box your using, this is inevitable. So I reinforced the crease with duct tape so it wouldn't be weak there. It doesn't really force it stiff, but makes it less likely to tear. This is also important if in the course of making the pattern you find (or make) a small tear. It's important to reinforce these things for structural integrity.

I made sure to iron my fabric cover (that's what the iron was for), and laid it out under the pattern, wrong side up. There are a couple ways to do this, depending on your skill, scissor sharpness, and general coordination. I found it most effective after a bit of trial and error to place the pattern on the fabric, leaving generous room for seam allowance, and used hot glue to make a line around the outer edge of the pattern and stick it to the fabric. This is kind of hard, and if you are using hot glue, you need to do one line at a time and stick it to each one before the glue cools. You can put glue all over the surface that's being covered, but with hot glue that kind of sticks up and if your fabric is thin, might be obvious on the finished product.

After the fabric is more or less secure, cut around the shape, again, leaving a bit of seam allowance. I left about an inch all around. you will have to cut a diagonal line where the bottom piece meets the spine in order to get the fabric to lay right. Then glue the fabric carefully onto the inner edges of the pattern. I was worried at first that I might have to allow for folding, but with the fabric I used it didn't make a difference. I just glued everything straight on, and when I folded it up it didn't really stretch or pull. Try to make sure there aren't bits of the corner folds sticking up by putting some glue between the folds.

Now it's time to put it together! Basically, it all kind of just happens intuitively, but fold up the bottom flap to a 90 degree angle, fold that last half-inch bit another 90 degrees, put a line of glue on the outside of that half-inch bit, and fold the spine and the other side up and over, so that the inside of the other long side glues flush with the bottom.

Obviously, you can decorate it any way you like. I decided to keep it fairly simple, and just add a ribbon around the bottom. Simply cut to the desired length, and glue on. You could go in any direction with this though, in fact if you have cool wrapping paper instead of fabric, that's probably a great option for your base cover. You could add beads, glitter, ribbons, decoupage, whatever. Make it a theme. Make it a mess. It's your thing, that's kind of the point!

And Voila! There's your magazine holder! Simple, takes about 10 minutes per piece depending on your level of skill. I'm sure there are more sophisticated ways to do this, but this was what I came up with in a pinch.

I'm kind of proud of it, since I just sort of did it without any tutorials. Some of the commercially sold ones also have a piece on the front, making it more of a closed box. I think that would be really easy to add, just cut a piece about 4 inches long (whatever the height of the straight edge in front) and an inch wider than the spine. Score and fold a half-inch on each side, cover with your fabric or whatever, and glue it in, using the half-inch tabs to attach to the inside of the front. We'll see how these stand up to the test of time, but I think they're pretty snazzy on my desk, holding my notebooks! (which, it turns out, are too wide to allow me put a front piece on. Oh well. I might do it for the one with my headshots.)
If you're like me, and the Christmas/winter holidays littered your house with amazon boxes, you're already well on your way to making some easy magazine holders. You might also have an iron, some fabric, hot glue or craft glue, a sharpie, duct tape, measuring tape/ruler, and scissors. It also helps to have some kind of straight edge.
First, I took a medium-large box and laid it out completely. I cut off as much tape as possible, and tried to get the whole thing flat. Then, I measured out the basic dimensions. Most paper is 8.5x11 inches in the US, so I made the long sides 9 inches wide, created a spine between them 2 inches wide, and below one of the long sides I cut a bottom that was 2.5 inches wide, so I would have a little lip to secure to the side and hold the shape. I experimented with two dimensions, one with a 2 inch spine and one with a 3 inch spine. The larger one was a little more stable standing, and better for binders and such. Most boxes have a lot of natural creases built in, so I used these as a guide. That was very helpful, and I ended up going with the natural height of the box, which was something like 11.5 inches. I then used closed scissors and scored along the places where it would bend. I marked the lines in black sharpie here. This is a very useful tool, and helps keep your scoring straight.
I made sure to iron my fabric cover (that's what the iron was for), and laid it out under the pattern, wrong side up. There are a couple ways to do this, depending on your skill, scissor sharpness, and general coordination. I found it most effective after a bit of trial and error to place the pattern on the fabric, leaving generous room for seam allowance, and used hot glue to make a line around the outer edge of the pattern and stick it to the fabric. This is kind of hard, and if you are using hot glue, you need to do one line at a time and stick it to each one before the glue cools. You can put glue all over the surface that's being covered, but with hot glue that kind of sticks up and if your fabric is thin, might be obvious on the finished product.
After the fabric is more or less secure, cut around the shape, again, leaving a bit of seam allowance. I left about an inch all around. you will have to cut a diagonal line where the bottom piece meets the spine in order to get the fabric to lay right. Then glue the fabric carefully onto the inner edges of the pattern. I was worried at first that I might have to allow for folding, but with the fabric I used it didn't make a difference. I just glued everything straight on, and when I folded it up it didn't really stretch or pull. Try to make sure there aren't bits of the corner folds sticking up by putting some glue between the folds.
Now it's time to put it together! Basically, it all kind of just happens intuitively, but fold up the bottom flap to a 90 degree angle, fold that last half-inch bit another 90 degrees, put a line of glue on the outside of that half-inch bit, and fold the spine and the other side up and over, so that the inside of the other long side glues flush with the bottom.
Obviously, you can decorate it any way you like. I decided to keep it fairly simple, and just add a ribbon around the bottom. Simply cut to the desired length, and glue on. You could go in any direction with this though, in fact if you have cool wrapping paper instead of fabric, that's probably a great option for your base cover. You could add beads, glitter, ribbons, decoupage, whatever. Make it a theme. Make it a mess. It's your thing, that's kind of the point!
And Voila! There's your magazine holder! Simple, takes about 10 minutes per piece depending on your level of skill. I'm sure there are more sophisticated ways to do this, but this was what I came up with in a pinch.
I'm kind of proud of it, since I just sort of did it without any tutorials. Some of the commercially sold ones also have a piece on the front, making it more of a closed box. I think that would be really easy to add, just cut a piece about 4 inches long (whatever the height of the straight edge in front) and an inch wider than the spine. Score and fold a half-inch on each side, cover with your fabric or whatever, and glue it in, using the half-inch tabs to attach to the inside of the front. We'll see how these stand up to the test of time, but I think they're pretty snazzy on my desk, holding my notebooks! (which, it turns out, are too wide to allow me put a front piece on. Oh well. I might do it for the one with my headshots.)
Saturday, December 15, 2012
Daily Work Schedule
I have problems with time management. Anyone who knows me at all knows this. In an effort to improve productivity in my career, I've been trying to get in 40 hours a week. It's been tough lately with the wedding and now the holidays, but after some inspiring quotes from writers about their work schedules, I'm taking a stab at re-imagining my daily routines.
1. Wake up at 6am as often as possible. Have breakfast and coffee, check emails, fart around on the internet, read, but only for the first hour of being awake.
2. After an hour to get myself moving around, do exercise and yoga. Go to the gym for cardio on the machines at least 3 times a week. Yoga every day, at least an hour.
3. Check audition notices first thing. Then again in the afternoon. Then again before bed.
4. After exercises and working on tuning my instrument (dance practice, vocal exercises) get right to projects. Prioritize them in order of deadline, then what's easier and faster to produce, then work on longer term/more complex work. Start no later than 10am.
5. Meditate after lunch if possible, or when getting home after my day job and before dinner.
6. Spend 1-2 hours looking for an agent, but no more than that.
7. Read more. Find time when I'm unable to function creatively instead of wasting time on the internet.
8. In the evening spend an hour or two on some of my other creative projects, like my writing or sewing.
9. Try and tidy the house in the morning, possibly after exercising, and at night before bed. Put things away as soon as I'm done using them. Also at this time, work on any tasks on my to-do list that are just mundane life stuff, like paying bills.
10. If I'm not doing anything in the evening, like going out with friends or seeing a show or IN a show, be in bed by 10pm. No internet after that.
11. No more facebook games. I can play on the XBox if I've gotten at least 20 hours of work done by Wednesday. Oblivion and Skyrim are best played in the afternoon and before dinner, especially if I'm spending a lot of time fighting undead.
I'm going to try to implement these guidelines now, as much as possible, but hopefully they will be in full effect by the new year! I'm almost done with my holiday preparations, so that should be easier to do. Too bad my day job is so busy right now! But things there will calm down in the new year, and I can concentrate more on acting and being organized. Productivity is hard. I'm hoping that more meditation and a better sleep schedule will help. Also, I want to get my place in better order so that it's more conducive to concentration...so basically clean and organize my junk. When everything is everywhere, it's harder for me to think, but also harder to get my ass moving around and cleaning. It's a vicious cycle.
1. Wake up at 6am as often as possible. Have breakfast and coffee, check emails, fart around on the internet, read, but only for the first hour of being awake.
2. After an hour to get myself moving around, do exercise and yoga. Go to the gym for cardio on the machines at least 3 times a week. Yoga every day, at least an hour.
3. Check audition notices first thing. Then again in the afternoon. Then again before bed.
4. After exercises and working on tuning my instrument (dance practice, vocal exercises) get right to projects. Prioritize them in order of deadline, then what's easier and faster to produce, then work on longer term/more complex work. Start no later than 10am.
5. Meditate after lunch if possible, or when getting home after my day job and before dinner.
6. Spend 1-2 hours looking for an agent, but no more than that.
7. Read more. Find time when I'm unable to function creatively instead of wasting time on the internet.
8. In the evening spend an hour or two on some of my other creative projects, like my writing or sewing.
9. Try and tidy the house in the morning, possibly after exercising, and at night before bed. Put things away as soon as I'm done using them. Also at this time, work on any tasks on my to-do list that are just mundane life stuff, like paying bills.
10. If I'm not doing anything in the evening, like going out with friends or seeing a show or IN a show, be in bed by 10pm. No internet after that.
11. No more facebook games. I can play on the XBox if I've gotten at least 20 hours of work done by Wednesday. Oblivion and Skyrim are best played in the afternoon and before dinner, especially if I'm spending a lot of time fighting undead.
I'm going to try to implement these guidelines now, as much as possible, but hopefully they will be in full effect by the new year! I'm almost done with my holiday preparations, so that should be easier to do. Too bad my day job is so busy right now! But things there will calm down in the new year, and I can concentrate more on acting and being organized. Productivity is hard. I'm hoping that more meditation and a better sleep schedule will help. Also, I want to get my place in better order so that it's more conducive to concentration...so basically clean and organize my junk. When everything is everywhere, it's harder for me to think, but also harder to get my ass moving around and cleaning. It's a vicious cycle.
Saturday, December 8, 2012
Why I do Student Films
I hear, once in a while, people complaining about acting in student films. To that I say, why NOT do a student film? Obviously, when you're like me and just starting out, you'll take anything you can get. I don't submit to roles I'm not comfortable with, but just the fact of the production team being students is no reason to turn them down, and here's why:
Students usually have access to a studio with equipment. That means your little short or independent feature has things like, cameras, lights, and more than likely, a crew. In my experience, these things add to production value and make your footage look better.
Sure, you aren't getting paid. Or at least not much. Still, they usually feed you at least. Plus you get footage for your reel, and if you don't have a long list of credits under your belt, that's pretty valuable. Sometimes copy can be really hard to get from a director. For some reason, they just want to hold onto it and never let you see it or have it. Even after the editing process, which admittedly takes a while, it can be tough. They have "other things to do" I guess. Or even better, they lose it! But students usually have things like deadlines, and often help with editing, so it's a lot easier to get your hands on that precious, precious video.
Yes, it's a bunch of amateurs who may or may not know what they're doing. But they also have teachers and mentors helping them out, keeping them on track, and advising them when they get stuck. I know more than a few "self-taught" film makers who find themselves stymied because they don't have the benefit of this knowledge on-set, which can cause delays and issues with production.
It's fun. It's, like, really fun. Students are passionate about their projects! Everyone involved is excited, and committed to the cause. They haven't been kicked down enough to hate what they do yet, and they aren't full of ego. They also aren't unrealistic, because they have been told what they should expect on a set.
This is all coming out of my most recent experience shooting a short film at LACC. I had a really good time, I felt like the director had a cohesive and defined vision, the professor was really nice and helpful while at the same time gave the director free reign, and for all intents and purposes, I felt like I was on a real set, with real film-makers. And it felt great to be a part of that. I can't wait to see how it turned out!
Students usually have access to a studio with equipment. That means your little short or independent feature has things like, cameras, lights, and more than likely, a crew. In my experience, these things add to production value and make your footage look better.
Sure, you aren't getting paid. Or at least not much. Still, they usually feed you at least. Plus you get footage for your reel, and if you don't have a long list of credits under your belt, that's pretty valuable. Sometimes copy can be really hard to get from a director. For some reason, they just want to hold onto it and never let you see it or have it. Even after the editing process, which admittedly takes a while, it can be tough. They have "other things to do" I guess. Or even better, they lose it! But students usually have things like deadlines, and often help with editing, so it's a lot easier to get your hands on that precious, precious video.
Yes, it's a bunch of amateurs who may or may not know what they're doing. But they also have teachers and mentors helping them out, keeping them on track, and advising them when they get stuck. I know more than a few "self-taught" film makers who find themselves stymied because they don't have the benefit of this knowledge on-set, which can cause delays and issues with production.
It's fun. It's, like, really fun. Students are passionate about their projects! Everyone involved is excited, and committed to the cause. They haven't been kicked down enough to hate what they do yet, and they aren't full of ego. They also aren't unrealistic, because they have been told what they should expect on a set.
This is all coming out of my most recent experience shooting a short film at LACC. I had a really good time, I felt like the director had a cohesive and defined vision, the professor was really nice and helpful while at the same time gave the director free reign, and for all intents and purposes, I felt like I was on a real set, with real film-makers. And it felt great to be a part of that. I can't wait to see how it turned out!
Sunday, October 28, 2012
Holy Cow, I Made My Wedding Dress!
It's true, I finally got married! It's also true that I made my own dress! For the record, I do not recommend this. It was a ton of stress, and while I saved a lot of money buying fabric direct from merchants in the garment district here in LA, I was still sewing it the night before the wedding, and had to rush to press the front of the hem that morning. So, yeah. Really hard job when you're also planning your wedding, and oh yeah, working like ALL THE TIME.
But let's discuss how I made it happen!
When I was thinking about what I wanted in a dress, I started by looking at what other women were wearing in Wiccan/New Age/Pagan weddings, since that was what I was planning for the ceremony. There is a big emphasis on Medieval and Renaissance design. A lot of people seemed to have bought their garb at Ren Fairs or something similar, and many weren't in white. I had long decided to forgo a veil in favor of a flower wreath. One of the paintings that really inspired me was this one, from around the 15th century:
 I especially liked the pick-ups in the front of the dress on the right! I was also heavily influenced by Neo-Classical art, Pre-Raphaelites, and of course the work of John William Waterhouse. I took the opportunity of a trip to visit my family in DC to take a camera to the National Gallery of Art. I also thought a lot about the practicalities of the dress. The wedding was in Idaho in October, and the weather there can be unpredictable. I decided it needed to have sleeves, but that the neckline should be off the shoulder. Here's a photo of the design I came up with:
 I started looking at patterns, and of course I had to adjust my design. I decided to go with a combination of Vogue Patterns V1095 and V2842. I also used a skirt pattern from Simplicity. Here's the design I came up with, using these patterns:
 It changed quite a bit because of the needs of the pattern. I added pick-ups in the front, and made the sleeves bell-shaped.
I decided to do a mock-up in muslin before cutting anything expensive. I bought two contrasting shades so I could tell the difference between the lace and the satin. Here's the result!
 I decided I would use whatever lace I had as an overlay on the bodice. The pattern called for a straight cut along the bottom, but I thought it would look better pointed. As I mentioned, I went to the garment district for my materials. I got some good deals too, because they don't mind haggling down there! I bought some beautiful satin from Michael Levine in a color called "candlelight" that had a beautiful glow to it. I had a hard time finding something with a low sheen, but I was trying to get a fondant effect. This stuff looked like cream! I had decided a while ago to use ivory instead of white, which I think worked out well with my skin. The easy part was first, the main satin dress:
 After that, I used some beautiful hand-beaded bridal net. It was really hard working around the design, and the inside of the dress is a nightmare, and I made it too big at first in the bodice, and the under-skirt dynamics were tough because it was so heavy and I ran out of time, but this is the final product!

(Huge thanks go to Israel Shirk of Avalanche Photography, and Alysha Cox who did the flowers!) Again, the bodice is a little big, but it's fully boned and laces up the back. Michael Levine was my source for steel bones which I used in the back lacing for support. And of course, it was a beautiful day for a wedding, with a clear sky and warm. I was so worried we'd all freeze, but it was actually pretty hot out! Anyway, I'm really proud of the finished product, I think for someone who's really only an amateur, this turned out really well. I got a lot of compliments and people couldn't even believe I made it myself! That's a win in my book.
But let's discuss how I made it happen!
When I was thinking about what I wanted in a dress, I started by looking at what other women were wearing in Wiccan/New Age/Pagan weddings, since that was what I was planning for the ceremony. There is a big emphasis on Medieval and Renaissance design. A lot of people seemed to have bought their garb at Ren Fairs or something similar, and many weren't in white. I had long decided to forgo a veil in favor of a flower wreath. One of the paintings that really inspired me was this one, from around the 15th century:
I decided to do a mock-up in muslin before cutting anything expensive. I bought two contrasting shades so I could tell the difference between the lace and the satin. Here's the result!
(Huge thanks go to Israel Shirk of Avalanche Photography, and Alysha Cox who did the flowers!) Again, the bodice is a little big, but it's fully boned and laces up the back. Michael Levine was my source for steel bones which I used in the back lacing for support. And of course, it was a beautiful day for a wedding, with a clear sky and warm. I was so worried we'd all freeze, but it was actually pretty hot out! Anyway, I'm really proud of the finished product, I think for someone who's really only an amateur, this turned out really well. I got a lot of compliments and people couldn't even believe I made it myself! That's a win in my book.
Monday, August 6, 2012
Presence!
No, I'm not talking about the things you get on Christmas and Birthdays, I'm talking about STAGE PRESENCE!
Now that I'm concentrating on film, it seems like a trickier prospect than it used to be. I was preparing for an audition recently, for a project I really wanted to do, so I asked my amazing acting coach Joel Asher to help me out, maybe give me some pointers for the sides I was given. He said something to me that really made me stop and think, and that I often think of when I'm working on a scene. He said "the acting is there, you just need more presence." Basically what he's talking about, as he explained, was that special X Factor (no, not like the show, but yeah kind of that), that "star" quality that people sometimes talk about, where you walk into a room and all eyes just naturally gravitate toward you. They HAVE to watch you.
This hasn't been a big problem for me in theater. I'm pretty good at owning a stage space. But I'm also more confident on stage, as opposed to in front of the camera, and so I think that even though I'm making good choices, being honest, and acting well, I'm not capturing the audience like I should. Confidence, of course, is really hard to learn. Especially when you get to the stage in your "career" where you must must must do a project soon or you think you'll never work again! At least, that's what I've been feeling like. I said to Joel, "I really want to do this project." He said, "good." Then I thought about how desperate I was feeling about getting something, anything, and I said it again. And he told me that the second time my face just lost everything. I suppose that was the difference between thinking how much fun I would have doing something I could really get behind, and thinking how shitty it feels to be out of work this long.
See, that's the real killer. That's the confidence sucking feeling that drains your presence. Part of getting it back is preparation. That's actually a huge part. The other part is trusting. I've always been better at trusting other people rather than myself. I work on feeling that "glowing" feeling whenever I think of it, so that one day I'll just embody it and it will be real and natural. Until then, I prepare as much as possible, give myself some affirmations, and dive in.
There's an anecdote in John Lithgow's book Drama: An Actor's Education, that describes an early audition at the Phoenix Theater in New York, in which Meryl Streep is auditioning. She comes into the room, introduces herself, and changes her shoes...and blows them away. His description of her charm and then her transformation is an excellent example of the kind of presence I'm looking to cultivate. And while for some that may be natural, and it may have even been natural for me at one time, it is also something I must now hone and develop. And I think I can. Lithgow describes the audition as the last she ever had to do, and I think I can believe it.

Also, I finally got a haircut, and now my hair matches my headshot again!
Now that I'm concentrating on film, it seems like a trickier prospect than it used to be. I was preparing for an audition recently, for a project I really wanted to do, so I asked my amazing acting coach Joel Asher to help me out, maybe give me some pointers for the sides I was given. He said something to me that really made me stop and think, and that I often think of when I'm working on a scene. He said "the acting is there, you just need more presence." Basically what he's talking about, as he explained, was that special X Factor (no, not like the show, but yeah kind of that), that "star" quality that people sometimes talk about, where you walk into a room and all eyes just naturally gravitate toward you. They HAVE to watch you.
This hasn't been a big problem for me in theater. I'm pretty good at owning a stage space. But I'm also more confident on stage, as opposed to in front of the camera, and so I think that even though I'm making good choices, being honest, and acting well, I'm not capturing the audience like I should. Confidence, of course, is really hard to learn. Especially when you get to the stage in your "career" where you must must must do a project soon or you think you'll never work again! At least, that's what I've been feeling like. I said to Joel, "I really want to do this project." He said, "good." Then I thought about how desperate I was feeling about getting something, anything, and I said it again. And he told me that the second time my face just lost everything. I suppose that was the difference between thinking how much fun I would have doing something I could really get behind, and thinking how shitty it feels to be out of work this long.
See, that's the real killer. That's the confidence sucking feeling that drains your presence. Part of getting it back is preparation. That's actually a huge part. The other part is trusting. I've always been better at trusting other people rather than myself. I work on feeling that "glowing" feeling whenever I think of it, so that one day I'll just embody it and it will be real and natural. Until then, I prepare as much as possible, give myself some affirmations, and dive in.
There's an anecdote in John Lithgow's book Drama: An Actor's Education, that describes an early audition at the Phoenix Theater in New York, in which Meryl Streep is auditioning. She comes into the room, introduces herself, and changes her shoes...and blows them away. His description of her charm and then her transformation is an excellent example of the kind of presence I'm looking to cultivate. And while for some that may be natural, and it may have even been natural for me at one time, it is also something I must now hone and develop. And I think I can. Lithgow describes the audition as the last she ever had to do, and I think I can believe it.
I mean just look at her...she always had that light!
By the way, the audition went really well. There were two roles I was reading for, and one was a sort of surly nurse. In my head, she had a cigarette hanging out of her mouth. I wasn't sure at first if I should use a prop, but when Joel saw me do the scene with the cigarette, he said "there she is!" I went ahead and used it for the audition (not lighting it of course!) and I had the casting directors laughing like crazy! I didn't get a call for the role, but later they re-posted it on actor's access and the age range was higher, so I think I just wasn't as old as what they were looking for. And that's okay, it's just really gratifying to know that I did my very best. Next time, I'll get it for sure!Also, I finally got a haircut, and now my hair matches my headshot again!
Monday, July 16, 2012
The Actor's Fund
Today I discovered something I wish I knew about when I first moved here, The Actor's Fund.
I was alerted to this group by a friend at work who is also an actress, and she showed me some of the job listings they provide, so I decided to check them out. I went to orientation today.
Basically, they are a safety net for anyone in the entertainment industry. They can provide financial aid, health insurance, career counseling, and a lot of other social services. They also have a job board that's full of jobs that are specifically useful to the needs of people in the industry, such as being really flexible with scheduling. A lot of their financial aid is only available to people who have actually been making money in the industry, so I don't qualify, but anyone can have access to their career services, counseling, training, and social workers.
When I say the financial stuff is for people working in the industry, keep in mind they aren't really demanding a lot. For most things, it looks like you need to have made at least $6500 per year for at least 3 years in the past 5 years. Or, conversely, $5000 per year for at least 10 years in the last 20. So they are certainly sensitive to the uncertainty inherent in the business. They are also housed in the same building as the SAG/AFTRA offices, so, convenient!
If you're like me, and not quite making money off of this whole showbiz thing, they have a lot of great resources. Classes for career development, skills for survival jobs, and support groups for various types of people. There is an AA group that meets there, as well as Under-earners Anonymous. They have computers available for job searching if you can't afford internet at home, and they will get you onto Westside Rentals without having to pay the fee if you're looking for housing. The career counseling seems to be geared toward finding a survival job, a sideline job, or a parallel career, as well as transitioning out of the business if that's what you've decided to do. They don't really offer anything in the way of networking or finding jobs within the industry, but if you just need to pay your bills, they're the place.
I urge anyone who is having issues with their career, or living in LA, to check them out. They are super nice, and they really get what it's like to be in the entertainment industry and what our needs are.
By the way, they were started in 1882 by Edwin Booth (brother of John Wilkes Booth), as a service to help actors get buried in sacred ground, something few people in the industry could afford at the time, and they still offer burial services.
I was alerted to this group by a friend at work who is also an actress, and she showed me some of the job listings they provide, so I decided to check them out. I went to orientation today.
Basically, they are a safety net for anyone in the entertainment industry. They can provide financial aid, health insurance, career counseling, and a lot of other social services. They also have a job board that's full of jobs that are specifically useful to the needs of people in the industry, such as being really flexible with scheduling. A lot of their financial aid is only available to people who have actually been making money in the industry, so I don't qualify, but anyone can have access to their career services, counseling, training, and social workers.
When I say the financial stuff is for people working in the industry, keep in mind they aren't really demanding a lot. For most things, it looks like you need to have made at least $6500 per year for at least 3 years in the past 5 years. Or, conversely, $5000 per year for at least 10 years in the last 20. So they are certainly sensitive to the uncertainty inherent in the business. They are also housed in the same building as the SAG/AFTRA offices, so, convenient!
If you're like me, and not quite making money off of this whole showbiz thing, they have a lot of great resources. Classes for career development, skills for survival jobs, and support groups for various types of people. There is an AA group that meets there, as well as Under-earners Anonymous. They have computers available for job searching if you can't afford internet at home, and they will get you onto Westside Rentals without having to pay the fee if you're looking for housing. The career counseling seems to be geared toward finding a survival job, a sideline job, or a parallel career, as well as transitioning out of the business if that's what you've decided to do. They don't really offer anything in the way of networking or finding jobs within the industry, but if you just need to pay your bills, they're the place.
I urge anyone who is having issues with their career, or living in LA, to check them out. They are super nice, and they really get what it's like to be in the entertainment industry and what our needs are.
By the way, they were started in 1882 by Edwin Booth (brother of John Wilkes Booth), as a service to help actors get buried in sacred ground, something few people in the industry could afford at the time, and they still offer burial services.
Subscribe to:
Posts (Atom)